
Painting
Before you paint
Section titled “Before you paint”Paint goes onto the selected layer. It is a good habit to add a fresh paint layer for each kind of detail: click the brush icon at the top of the Layers panel. Then if you do not like the result, you can hide or delete that layer and nothing else is lost.
You can paint in either viewport. Painting on the 3D model is quick for details. The 2D UV view is better when you need every pixel exactly in place.
The tools
Section titled “The tools”
The top four buttons on the left rail are the painting tools:
| Tool | Key | What it does |
|---|---|---|
| Brush | B | Paints where you drag. |
| Eraser | E | Removes paint from the layer, so the layers below show through again. |
| Fill | G | Fills an area in one click. |
| Marquee | M | Drag a rectangle and everything inside it gets painted. |
Every stroke, fill or rectangle is one step you can undo with Ctrl+Z.
Brush and Eraser
Section titled “Brush and Eraser”Size, Angle and Opacity are in the Properties panel. Size is in pixels, so a size of 1 paints exactly one pixel. Angle turns the brush shape, which matters for a square or a brush you drew yourself; a round brush looks the same at any angle, and the dither and scatter patterns stay lined up with the pixel grid.
You can change them without leaving the viewport:
- Ctrl + right-drag: drag right for a bigger brush, left for a smaller one.
- Ctrl + left-drag: left and right change the opacity, up and down turn the angle. Each drag changes only one of the two, whichever way you start moving.
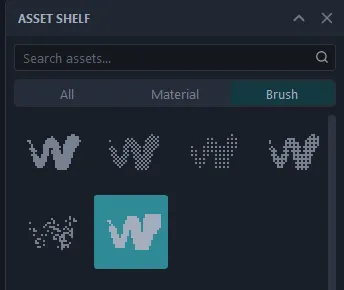
The brush shape comes from the Brush tab of the Asset Shelf. Six come with the app: Circle, Square, Scatter, and Dither at 25%, 50% and 75%. The Dither percentage is how many pixels inside the brush get paint, so 25% is a light, open pattern and 75% is nearly solid. Dither and Scatter are handy for rough, broken-up pixel textures. You can make your own with Brush Designer.
Pick what one click fills with Scope:
- Face - the single polygon under the cursor
- UV Island - the whole connected piece of UV under the cursor
- Tile - the whole UDIM tile under the cursor
- All Tiles - every tile on the layer
Marquee
Section titled “Marquee”Drag a rectangle over the model. Depth decides what counts as inside it:
- Visible - only the surface facing you
- Through - everything the rectangle covers, including the back of the model
In the 2D view there is no front or back, so everything inside the rectangle is painted.
Straight lines
Section titled “Straight lines”Click once where the line should start, then hold Shift and click where it should end. You get a straight line between the two. It still works if you turn the camera between the two clicks, because the start point sticks to the model, not to the screen.
Colours and other channels
Section titled “Colours and other channels”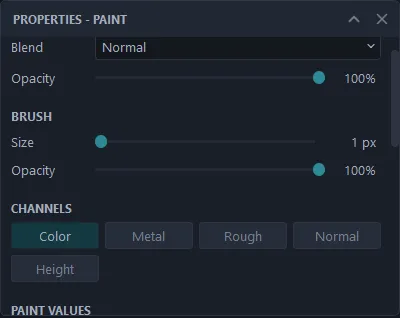
Click a colour in the Palette to paint with it. You can also type a hex value or RGB numbers under Paint values in Properties, or use the picker to grab a colour from anywhere on screen.
A stroke does not have to be just colour. The Channels buttons in Properties (Color, Metal, Rough, Normal, Height) choose which maps the brush writes to, and each one has its own value. For example, paint Color and Rough together to make a patch that is both darker and duller. Turn Color off and paint only Height to add bumps without changing the colour. Alt-click a channel button to paint that channel alone; Alt-click it again to turn them all back on.
For Height, middle grey means flat. Lighter raises the surface and darker pushes it in.
Symmetry
Section titled “Symmetry”The Symmetry button above the viewports mirrors every stroke across the model. The arrow next to it opens the settings, where you pick the axis (X, Y or Z) and move the mirror centre if your model is not centred.
If you forget to turn symmetry on, you can still fix it afterwards: right-click the layer and use Paint Mirror. See Layers.